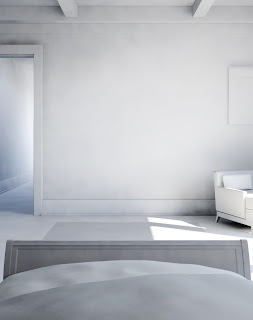
Thought I'd share a working method for lighting if it weren't already obvious to you (It probably is). Just like animation, blocking is an important stage. Roughing out light positions, intensities, etc. should be as fast and interactive as it can be. When dealing with say, and interior render with GI, bounces, and such, fast seems to be an oxymoron. It can be bearable, and even fun if you optimize your scene for it.
Just like blocking an animation, you don't need every feature turned on. While you can always tune your render settings, that's not what I'm talking about. I leave my FG and AA at medium. Say 75FG samples, 20 interpolation and global AA at 0 or 1 to start. Beyond that, the biggest slowdown in a render are the shaders. So use something very simple to block out lighting. a light grey mia or even a lambert. Such materials will render much faster.
 My workflow is to create a lightingBlocking renderLayer with a material override to the mentioned grey material. Start blocking lights and render iteratively, or use IPR. Blocking lights without the interference of material color is useful in 2 ways. First in speed as mentioned, but also to judge values and lighting ratios more easily. Here's an example of a blocking render for a recent job. Some clients are receptive to seeing this stage, some are not. But if nothing else, it is helpful for you to make creative judgements.
This is closer to a final blocking. In earlier iterations the bed was too dark, as was the hall. So a window was added to the hall, and a lamp (omni light) was placed at the bedside to fill the bed a bit. Ulimately, one more light was placed in the hall, and minor tweaks to some settings were required once full color and materials were added.